
Find the fight and keep a return save
This is the Film School mirror encounter after developing the Photo. Use the finished Photo in the Floor 3 bedroom frame, collect the Hexagonal Stone from its drawer, then return to the locked door at the top of the school stairs. Speak to Sanguis, enter and save before approaching the curtains.
If that door is still locked, return to the darkroom route and check that you have the finished Photo rather than the Negative or Printed Photo. The walkthrough connects those items. Vitria’s performer is identified separately in the cast guide.
Before entering, decide whether this is a normal clear or Wrench Queen attempt. The save before the fight protects that choice; switching back to the Wrench after an off-route attack does not undo it.
Read the current state before attacking
| What is happening | Your immediate task | Sign of progress |
|---|---|---|
| Opening tentacle monster | Dodge a committed attack, then counter during recovery | The reflection-based encounter begins |
| Red sigil around the body | Find and strike the floor tentacle visible through its reflection | The boss becomes stunned |
| Body exposed after the stun | Use the opening to damage the body | A mirror section cracks |
| Cracked section becomes an entrance | Go through it | Julia enters the reversed arena |
| Inside the mirror | Check movement direction and attack the emerging floor tentacles | Julia returns outside for the next cycle |
Treat shield removal, body damage and entering the mirror as three different actions. Repeating only one of them is why a surviving attempt can appear to make no progress.
Opening attacks and grapple escape
The opening creature uses a forward reach, a charged vertical attack and a four-tentacle diagonal spread. Bait a committed attack, leave its line, counter briefly and move again. Do not turn a single opening into a long exchange.
A grab needs its own response: rapidly press your bound interact control to escape the pull. This is the publisher-pinned guide’s instruction. Walking away or holding aim is not the escape input. See its short grapple demonstration if the pull keeps killing Julia.
Remove the shield, then damage the body
The red floor sigil is protection. While it remains, save ammunition and read the mirror for the floor tentacle’s position. Hit that tentacle until it creates a stun, then switch your attention to the exposed body. Watch for cracks rather than assuming every attack landed.
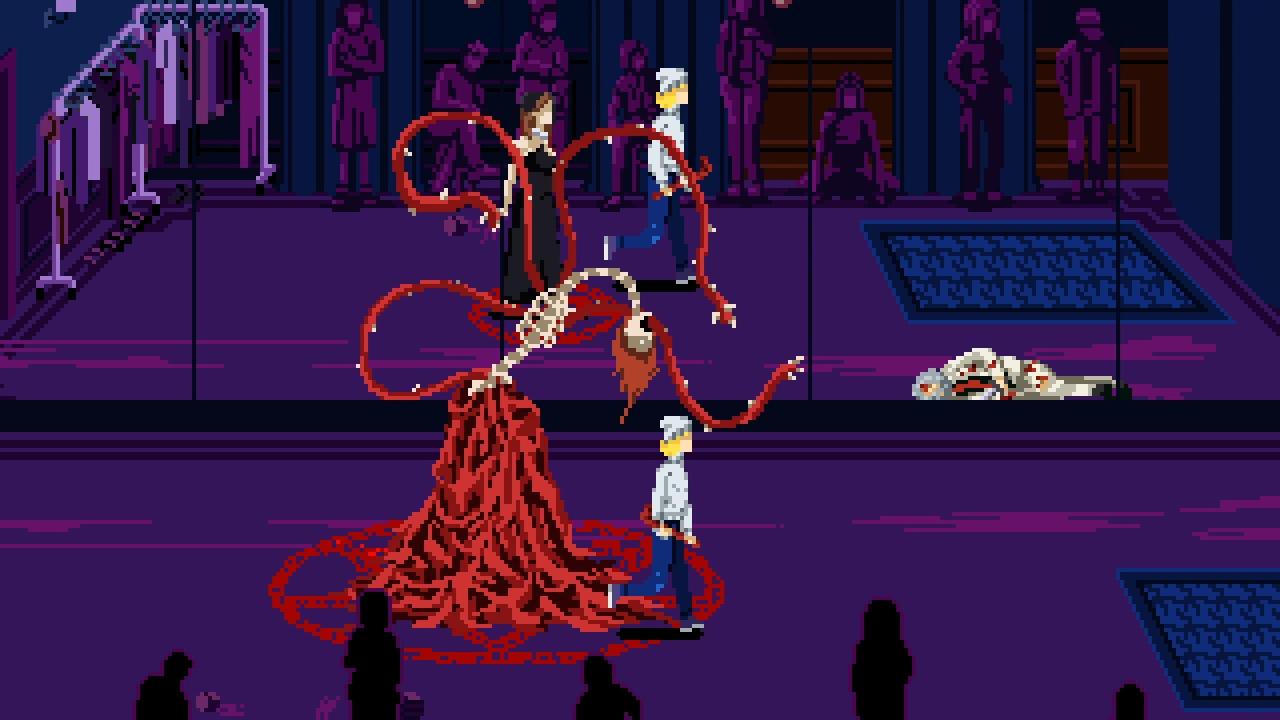
- Red sigil: do not spend body attacks while protection remains.
- Mirror: watch here for the floor tentacle, then strike its arena position.
For an unrestricted run, Into Indie Games recommends the Revolver during the brief body opening; Prima’s guide favors the Pipe’s wider arc for grouped tentacles. Those recommendations address different targets. For Wrench Queen, keep the vulnerability sequence but use only the permitted weapon. Do not copy the firearm choice from a demonstration.
Enter the broken mirror and check reversed controls
Once a section breaks into an opening, enter it. Continuing to attack outside cannot complete the inside step. Release any held movement, test a short input and adjust to the reversed direction before approaching hazards. Strike the tentacles emerging from the floor until the game returns Julia outside, then read the shield and reflection again.
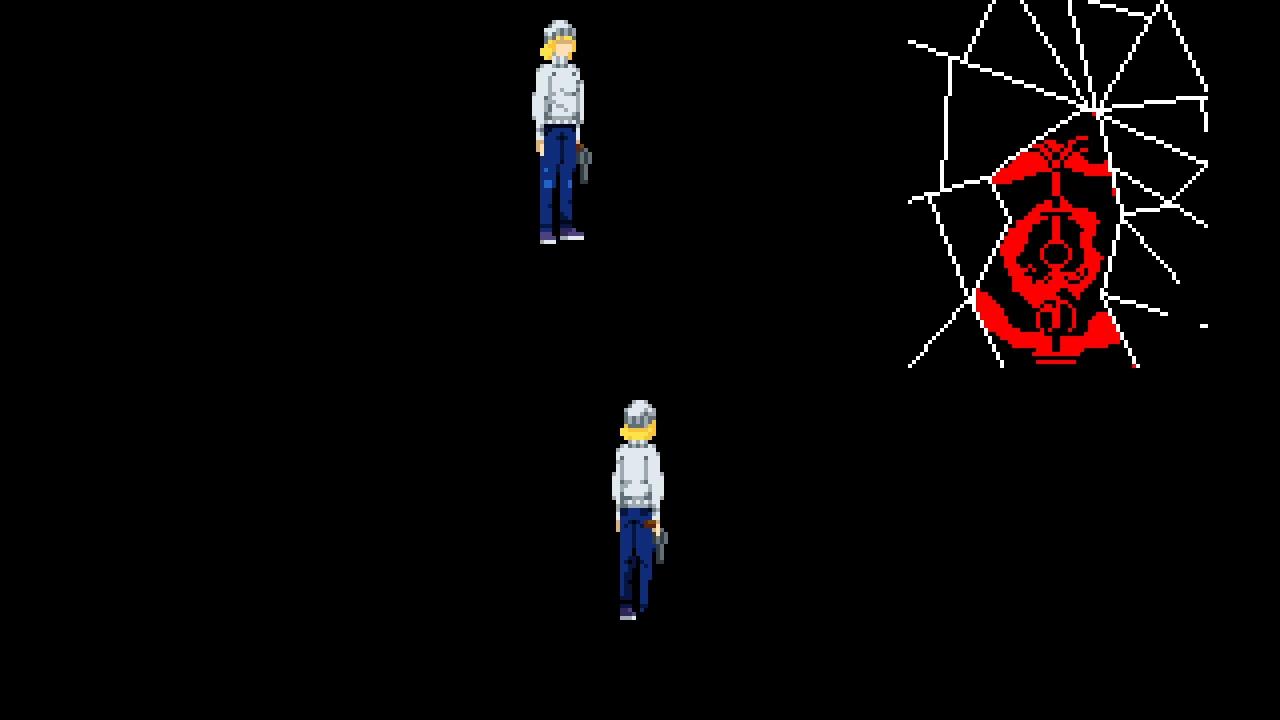
- Enter this opening; further outside attacks do not replace the mirror section.
Later cycles can crowd the room with more tentacles. Leave space to turn, avoid holding the old direction through a transition and use the same visible-state checks. Published playthroughs describe recovery checkpoints, but keep your manual save: this guide does not promise an identical retry point or healing behavior on every build.
Diagnose the failed attempt
| Problem | Next retry |
|---|---|
| Body attacks never work | Check the red sigil; create the tentacle stun first |
| You cannot find a floor target | Read its reflection and compare the arena position; do not shoot the reflected woman indefinitely |
| You stun her but get no new cracks | Be ready to use the body opening before she recovers |
| Julia is pulled into an instant death | Mash interact as soon as the grapple starts |
| Julia walks toward danger after entering | Release movement and test the reversed controls |
| The fight loops without changing rooms | Check whether an opened mirror section still needs to be entered |
| You ran out of ammunition | Keep solving the vulnerability step with melee; do not fire into the shield |
After the victory
Speak to Sanguis and collect the Iron Key and Lapis Fictus Pill. Continue with the ritual and later chase. Before leaving the original-world route, use the save plan to check unfinished collectibles and challenges.
Sources and limits
- Publisher-pinned Puzzle & Boss Guide: grapple escape and its demonstration.
- Muhit Rahman / Into Indie Games, Part 3: access, reflected-tentacle cycle, mirror entrance, screenshots and next items.
- Syed Hamza Bakht / Prima Games: Vitria guide: attack patterns and melee coverage of grouped tentacles.
Checked October 24, 2026. This is a synthesis of published guides, not a claim of an in-game clear by this site. Fixed hit counts and universal checkpoint guarantees are omitted.